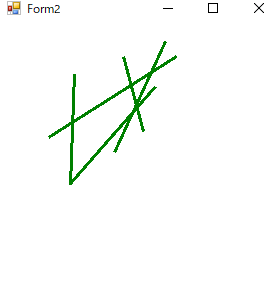
「次々と直線を描画する」をちょっとだけ発展させてみました。
事前準備は大量にあるため、一番下に書きます。
直線の太さと色を指定し、次々と直線を描画していきます。
一時的な線が一番上に表示されるように、Paintイベント中で、
描画順を変更しております。
※フォームのリサイズなどでも描画は消えません
Public Class Form1
Private ClickCount As Integer
Private Lines(0) As Line
Private Structure Line
Dim stX As Integer
Dim stY As Integer
Dim enX As Integer
Dim enY As Integer
Dim col As Color
Dim wid As Integer
End Structure
Private Sub PictureBox_MouseClick(ByVal sender As Object, ByVal e As MouseEventArgs) Handles PictureBox1.MouseClick
If ClickCount = 0 Then
ClickCount = 1
Lines(0).stX = e.X : Lines(0).stY = e.Y
Lines(0).enX = e.X : Lines(0).enY = e.Y
Lines(0).col = Label1.BackColor : Lines(0).wid = NumericUpDown1.Value
NumericUpDown1.Enabled = False : Button1.Enabled = False
Else
ClickCount = 0
ReDim Preserve Lines(UBound(Lines) + 1)
Lines(UBound(Lines)).stX = Lines(0).stX : Lines(UBound(Lines)).stY = Lines(0).stY
Lines(UBound(Lines)).enX = Lines(0).enX : Lines(UBound(Lines)).enY = Lines(0).enY
Lines(UBound(Lines)).col = Lines(0).col : Lines(UBound(Lines)).wid = Lines(0).wid
NumericUpDown1.Enabled = True : Button1.Enabled = True
End If
PictureBox1.Invalidate()
End Sub
Private Sub PictureBox_MouseMove(ByVal sender As Object, ByVal e As MouseEventArgs) Handles PictureBox1.MouseMove
If ClickCount = 1 Then
Lines(0).enX = e.X : Lines(0).enY = e.Y
PictureBox1.Invalidate()
End If
End Sub
Private Sub Picture_Box(ByVal sender As Object, ByVal e As PaintEventArgs) Handles PictureBox1.Paint
For i As Integer = 1 To UBound(Lines)
e.Graphics.DrawLine(New Pen(Lines(i).col, Lines(i).wid), Lines(i).stX, Lines(i).stY, Lines(i).enX, Lines(i).enY)
Next
e.Graphics.DrawLine(New Pen(Lines(0).col, Lines(0).wid), Lines(0).stX, Lines(0).stY, Lines(0).enX, Lines(0).enY)
End Sub
Private Sub Button1_Click(ByVal sender As System.Object, ByVal e As System.EventArgs) Handles Button1.Click
ColorDialog1.Color = Label1.BackColor
If (ColorDialog1.ShowDialog() = Windows.Forms.DialogResult.OK) Then
Label1.BackColor = ColorDialog1.Color
End If
End Sub
End Class
事前準備
・フォームのサイズを(300 , 300)に変更
・Panelを上の方に貼り、DockプロパティをTOPへ変更
・PictureBoxを下へ貼り、DockプロパティをFillへ変更
・Panel内に、「NumericUpDown」と「Label」、「Button」を貼る
・ColorDialogを持ってきて、適当なところへ持ってくる
後はお好みです。
(NumericUpDownの上限と下限をいじる、など)

関連記事
・次々と直線を描画する
・ラバーバンド(Paintイベント処理)
システム開発のためのVB.NETプログラミング関係一覧に戻る